B U I L D - A - C A M P E R |
I need to find an RV for my trip. My initial plan was to look for a van camper, these vehicles come pre-configured with such amenities as sinks, stoves, toilets, microwaves, refrigerators, showers. It's just amazing to me how much of your "home" you can cram into a van.
The problem I've encountered is not many van camper conversions are on the market and the really nice ones get snatched up real quick. It's definitely a seller's market out there. After looking at many vehicles (some too old, some too expensive, the rest having too many problems) and coming up empty, I've decided to strike out on my own and Build-A-Camper, similar to the principal behind the Build-A-Bear stores that have been popping up lately. But instead of using arms, legs and fuzzy ears as raw materials, I'll be struggling with wood, nails and camping equipment. My parents have graciously agreed to help me with this project (dad used to build houses and mom can stitch and sew most folks under the table) so with their help I'm hopeful we'll come up with a useful configuration that'll make life more comfortable for me whilst on the road.
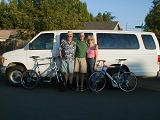
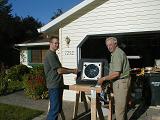
So, without further delay, introducing the Monster ... er ... Adventure Garage Design & Build Crew.
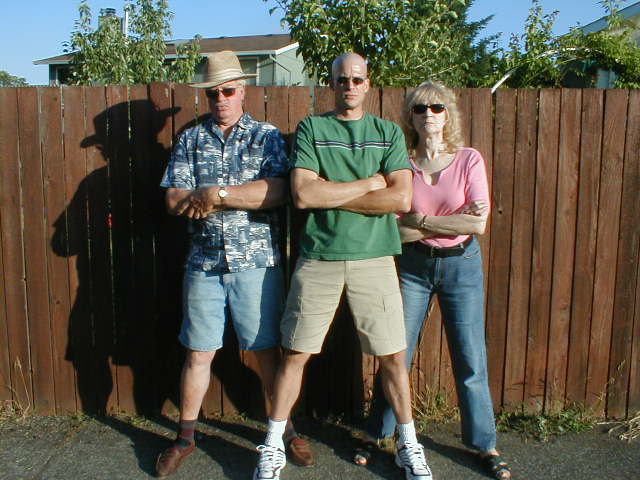
On the left we have Richard "The Hammer". As long as I can remember he was always making and fixing various things around the house when I was a kid (doing a good job at it as well). He's on-board as the crew's co-architect and general know-it-all regarding how to engineer something out of nothing. On the right we have Betty "The Needle". She is a master with the sewing needle and has great know-how in the fine arts of fabric engineering. In the center we have Jeff "The Adventurer". He's on the team as co-architect, primary financial contributor, and driver of the crew's final creation.
The crew's goal is to come as close to replicating the sweetest ride that got away from me in my RV searching, seller wouldn't drop the price to match my budget. One thing for sure, the seller is gonna make some buyer a real happy camper!
This webpage is dedicated to showing you how to Build-A-Camper. Mind you, the crew has never attempted such a thing, but in the end we hope to create something that's both functional and pleasing to the eye.... well.... okay, just functional. Only God knows what it's going to look like when we're done.
CAMPER CONSTRUCTION
The process of converting a passenger van to a camper was both fun and educational. Taking a little more than three weeks of part-time work produced something that far exceeded my expectations. It's quite amazing what a little planning and imagination can do for you.
CAMPER CONSTRUCTION INDEX
VAN PURCHASE
A good friend told me the State of Oregon auctions off their retired vehicles through eBay. They usually just want to get rid of them and don't set a reserve amount (meaning there is no a minimum bid). Well as luck would have it, the State of Oregon was auctioning off two vans, a 97 and a 99. The 99 was a better van so I set my sights on it. Having never bought anything on eBay, I was a little hesitant to make my first purchase something as expensive as a vehicle but after looking at eBay's help information concerning bidding, my confidence grew. I drove down to Salem to look at the van and it turned out to be in very good shape.
I decided I was going to put a bid on the van just minutes before the auction closed. 5 minutes from auction close, the highest bid for the van was $6,510. I entered a maximum bid price of $10,051, knowing this was around the value of the vehicle when sold by a private party. My bid entry bumped the bid to $7,150. In the last minute of the auction, two other bidders tried to grab the van away from me but fortunately their maximum bids were under mine. In the end I got it for $8,010 which turned out to be a pretty good deal.
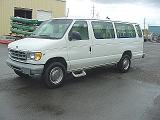
Here is a picture of the van, it's a 1999 Ford E350 XL Super Duty. It has 64,000 miles and a V10 engine. It's a big engine and will get worse mileage than a V8 but I do need the extra power for driving in the mountains. And with all that I'll be hauling around, I'm sure it'll come in handy.
Back to Camper Construction List
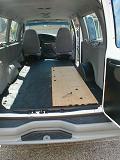
SEAT REMOVAL AND FLOOR CLEANING
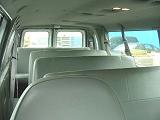
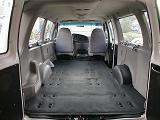
Before I could convert the van to the camper, I had to remove the 4 bench seats (the van can carry 15 people) and clean up the floor. All of this went along smoothly and in the end I created an empty space (11 foot long, 5 1/2 foot wide, 4 foot high) within which my father and I will apply our lacking expertise of camper conversion. The black dots on the floor represent the anchor bolts for the bench seats. We'll use them to anchor the various structures we'll be putting into the van.
Back to Camper Construction List
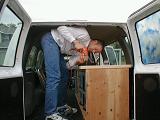
PRE-CONSTRUCTION PLANNING
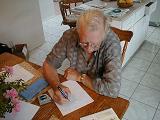
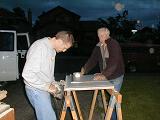
One main principle of our construction strategy is to "keep it simple". Another is to "keep it cheap". So with that in mind, the primary requirements for the camper are 1) bed, 2) water source, 3) AC/DC electric source, 4) storage space, 5) table, 6) icebox. Here is my Dad (Richard) slaving away at van camper design. He's been such a great help with this, glad he's on-board and willing to lend a helping hand.
Back to Camper Construction List
STORAGE
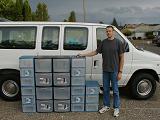
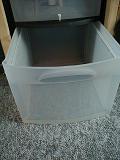
One way to keep it simple and cheap is not to build all the storage space from scratch, that's just too much work. The easy way out is to buy plastic storage units that have drawers. These storage units are modular in nature where you can stack drawer upon drawer to get the height you desire. For me, I'm using 2 and 3 drawer configurations. I've lined up all the storage units for your viewing pleasure. I actually plan to use one of the black 2 drawer units for my sink. All I have to do is cut a hole in the top, drop in the sink, and use the bottom drawer to catch the waste water. If I just empty it out everytime I use the sink, I can avoid any risk of spillage when I'm rolling on the road to my next biking destination. The remainder of the storage units (minus one of the blue 3 drawer units) will go under my bed.
Back to Camper Construction List
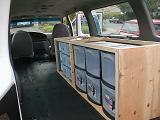
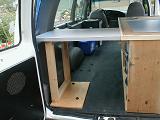
BED/STORAGE CONSTRUCTION


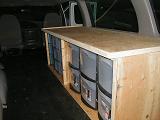
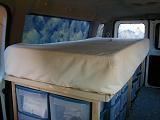
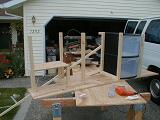
The bed/storage unit is built out of plywood and 2 x 2s. Screws are used instead of nails. The plywood platform of the construction is anchored using 6 of the multitude of seat anchor bolts that are spread across the floor. On top of that we placed all of the storage drawers to get an idea of how to build a framework around the storage units that will support my bed. We then built the 2 x 2 framework outside of the van to give us more elbow room. Once constructed, we put the 2 x 2 framework back into the van, tightened the 6 anchor bolts then filled it with the storage drawers. Now all that was left to do was to cut a plywood top and screw it down. We finished the construction just as night fell. The wood flange around the top will help keep the matress in place. I'm pretty happy with how it turned out. Eventually I'll hang curtains around the drawers to hide all the storage units but that'll have to wait until near the end of the camper conversion.
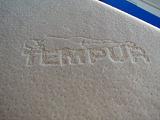
The bed itself is a Tempurpedic, the world most comfortable bed. I bought a king-size Tempurpedic bed a few years ago I would have been horrified to think about cutting it into two pieces back then. But since I've grown so used to sleeping on it, I had no choice but to bring it along. So, with knife in hand I cut off a 32 inch by 80 inch slab. The bed comes in a really nice zip-up mattress cover so I decided to use it and wrap any excess cover under the mattress. When I return from my trip, I can resurrect my king-size bed by putting the two pieces back together and zipping it all up in the mattress cover.
Back to Camper Construction List
TABLE CONSTRUCTION
The table design took a couple of iterations before we nailed down a final design. The final design actually didn't happen until we were well into the construction phase. But like all good builders, we were able to switch gears and in the end the final product turned out better than we expected. The table consists of a solid structure on one side. It is to the top of this structure that the table top is hinged to. When in use, the table top swings up and is attached to the edge of the bed via three fasteners. There is just enough room for me to sit under the table as you can see.
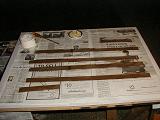
We put formica on the top and all four sides of the table surface. Here are the glued side pieces waiting to be applied. Once all the formica pieces were glued in place we used a belt sander to smooth the edges of the table for a nice, finished look. Well, kinda finished, the flaws are invisible since I didn't take any close-ups. But all in all it came out pretty good considering we've never worked with formica before.
Back to Camper Construction List
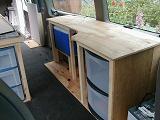
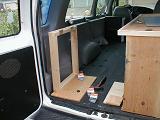
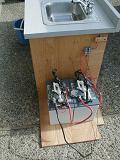
KITCHEN CONSTRUCTION
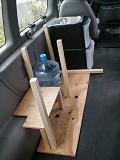
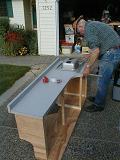
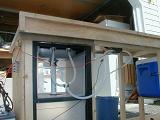
The kitchen consists of a sink, storage for 2 potable water tanks and 1 cooler, and a counter surface. Just like the bed/storage construction, this construction will contain a frame sub-structure which we'll bolt to the floor and add a countertop. The little shelf unit to the left is where the cooler will go. The two water bottles will go between the cooler and the sink (the black cabinet). The kitchen is located on the left side of the van, just behind the drivers seat. Here we've added a countertop to the it all together.
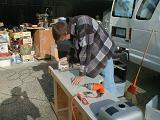
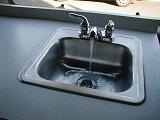
Next we put formica on all the counter surfaces and then cut a hole for the sink. Here's dad measuring the hole and me cutting the hole. Cutting the hole was pretty easy, you just have to have the right tools, and for this job our jigsaw came in handy. Dad kept on telling me to be careful not to break the saw blade. No wonder, when I was a kid I'd always be borrowing his tools and would frequently either break or lose them. I'm now an adult now but little *sigh* has changed I'm afraid. With the sink temporarily in place, we decided to put the kitchen unit in the van to make sure it still fit correctly now that we've added a backspash.
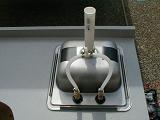
Next I plumb the sink. Both faucets will deliver water and are fed by a single source line. Once the sink was ready, I glued it down into the counter then connected the water pump that is mounted underneath the counter. We used a bucket of water to test water delivery and it worked without any problems. The volume of water flow was more than adequate although the pump is a little loud, it sounds like one of those electric air pumps that you pay 50 cents at the gas station to fill up your car tires. The pump itself is pressure activated, meaning when I close the faucets it automatically stops. But to be on the safe side, I installed a switch that turns off the power to the pump. Don't want to come back from a bike ride to find 5 gallons of water all pumped out all over the van's interior because my plumbing sprung a leak.
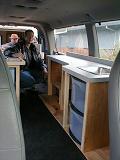
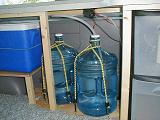
We mounted the kitchen unit back into the van and secured two 5 gallon water bottles with bungee cords. One bottle is active (right side) and the other is in reserve. The water bottles have a handle built into the side for easy handling when I need to refill them. And yes, the water does work as shown by this test. So where does the water go? Well it goes in the bottom drawer! All I have to do is pull out the drawer and empty it.
Back to Camper Construction List
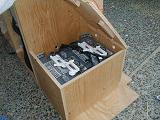
AUXILARY POWER
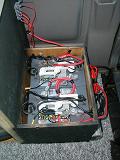
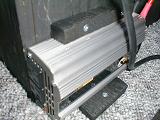
The auxillary power consists of two 6 volt RV batteries connect in series, which make them 12 volts. I was told it's better to use two 6 volt batteries than a single 12 volt battery, supposedly they are quicker to charge and they last longer. The batteries sit side by side and are connected to an adhoc fusebox consisting of 4 fuses. One fuse is for the water pump, another is for the exhaust vent fan, and the remaining two will be for lighting. To secure and hide the batteries I built a battery box. The final configuration is a messy jumble of cables and connectors. Attached to the side of the battery box is an AC inverter. This will come in handy when I need to plug in my laptop and other equipment requiring AC power.
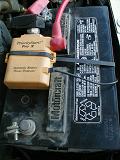
The two RV batteries are connected in parallel with the primary battery that's located in the engine compartment. I had my mechanic install a cool system called Priority Start. This system will shut down the van's electrical system when it drains below 12 volts. That way it's impossible to drain the three batteries to the point where the van won't start. Some places I'll be going will be remote and I cannot afford to be stranded by dead batteries.
Back to Camper Construction List
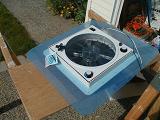
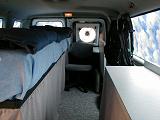
EXHAUST VENT FAN

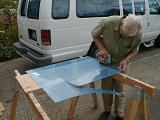
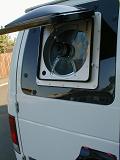
The exhaust vent fan is a pretty nice one, it has 3 speeds and a thermostat control. Problem is it's supposed to be installed atop the vehicle's roof. Fortunately we didn't have to cut a hole in the roof, Dad had a brilliant idea to mount the fan in one of the rear windows. The rear window was very easy to remove, it's just mounted with 4 bolts. I bought some plexiglass and Dad was able to cut it to size using a jigsaw. Once the window was cut, Dad popped the vent fan right into the plexiglass and with a little black paint and a wood spacer, we secured the fan and window into a single unit that's ready for mounting. Once mounted in the rear window, I used silicone caulk to seal it all up from the elements. Here is the fan in its full operational glory!
Back to Camper Construction List
WINDOW TREATMENTS
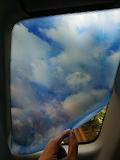
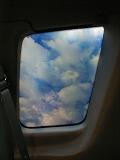
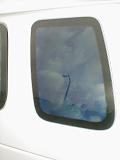
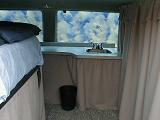
Privacy is a concern since I'll be living in this van for a couple of months. I had initially thought of installing some kind of drapes or blinds but cast that idea aside when I stumbled across a plastic window film that is translucent in nature. I didn't have much selection in terms of patterns, most were either flowers or ugly geometric designs so in the end I chose a cloud pattern, the only acceptable design they had.
Installation was pretty simple. Just cut out the plastic film to match the shape of the window, spray the window and plastic with water, then apply. Once applied to the inside of the window, I used a flat surface (credit card) to push out all the air bubbles. Here is the window from the inside and the outside.
Back to Camper Construction List
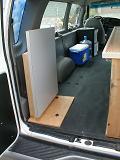
CARPETING
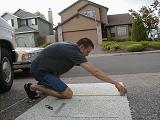
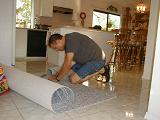
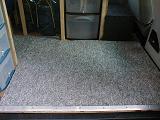
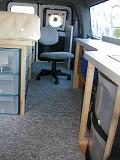
Installation of carpeting was a must to give the van a feeling of home. So with that in mind, I found a nice neutral color that hides dirt and has a low pile. First I cut and installed carpet padding, followed by the carpet itself. In the end the installation went smoothly, here is a pic from the side door and another looking aft.
Back to Camper Construction List
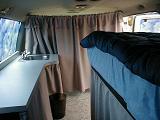
DRAPES
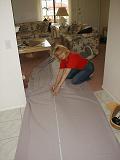
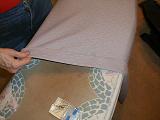
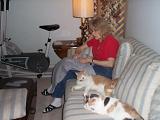

In order to cover the ugliness of the storage drawers and the area under the kitchen unit as well as to provide privacy curtains between the cab and rear of the vehicle, I recruited Mom (Betty aka "The Needle") to make some drapes. Sewing is a bit of a mystery to me, about the best I can do is stitch a button which is sure to fail with a couple weeks of light usage. Had I been tasked to create the drapes myself, I think I probably would have used a stapler, a needle and thread is way too complicated. But all those thoughts were simple folly since she was willing to volunteer her sewing expertise.
Here she is pinning and ironing. Initially she had to sew the drapes by hand (assisted by Gobie and Tao) but luckily my sister Teresa had a sewing machine so she used that to finish up.
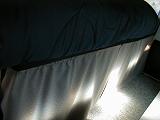
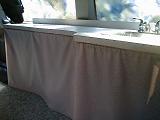
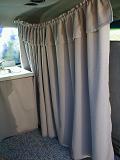
Mom did a great job as you can see. All her cutting, ironing, sewing and hemming produced a true materpiece of seamstress engineering. Here are the drapes for the storage units, the kitchen, and the privacy curtains. Pretty killer ruffle on those curtains don't ya think?
Back to Camper Construction List
BIKE CARRIER
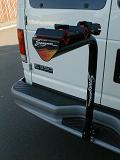
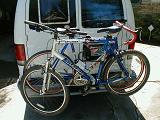
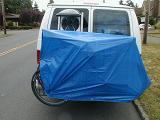
I installed a Swagman bike carrier. This version can carry 3 bikes and has a feature that allows me to swing it down (assumes the bikes have been removed from the carrier) so I can gain access to the rear doors. Typically I'll mount the mountain bike last for easy access because that's my "bike around town" bike and has a steel locking bar mounted on the frame for easy access and securing whilst out and about. I needed to figure out how to cover the bikes to keep them out of the weather. Initially I bought individual bike covers and with sissors in hand cut them to go around the bike carrier. What a mess that turned out to be. So I ended up buying a $4.00 tarp and bungeed it into place.
Back to Camper Construction List
LAPTOP HOLDER
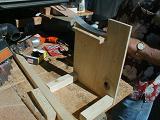
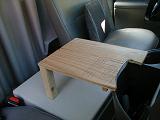
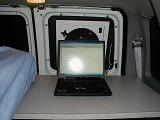
I needed a way to secure my laptop while driving in a position that's easily accessable to the eyes and hands. No, I won't be playing video games or checking email while I'm driving, rather I'll be using GPS software to navigate my way across the country. My efforts to buy a holder/platform for my laptop came up empty but dad was willing to build one from scratch so I set him loose on making one. First he started out building the platform out of wood. The piece of metal he's nailing onto the platform is a "clamp" of sorts that'll fasten one side of the laptop holder to the van's console. Here is a picture of the same platform when mounted in the van.
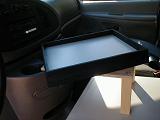
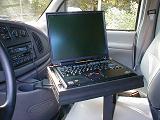
Next step was the addition of a laptop tray that'll hold the laptop into place. Dad used the square board (scrap) that was created when we cut the hole out in the sink. Since it came from the kitchen countertop, it's covered with formica so it's not only functional but pleasing to the eye as well. He added trim around the tray to keep the laptop from falling out during sudden stops or sharp turns. Here is the final configuration with the laptop in place.
Back to Camper Construction List
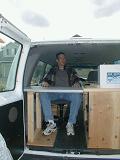
THE FINAL PRODUCT
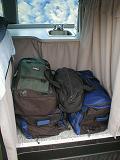
Here is the final product of approximately three weeks of part-time work performed by the crew. I wish to thank my folks for their loving support and efforts with this design and build adventure. The final conversion far exceeded my initial expectations. I'm afraid to think what kind of monstrosity I would have created had I been on my own.
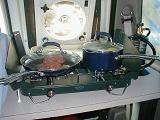
Here is the view when entering the van from the side doors. This view is looking forward, this is looking aft. Here is all the additional gear I'm bringing on the trip (aside from all the stuff that'll be stored under the bed). Here is a some cooking and laptop action.
Back to Camper Construction List
|